Curtis.Castiglione@ROzebra.com
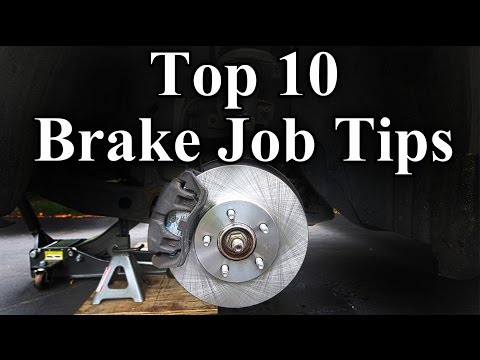
DIY Car Brake Pad Cleaning Guide
You are pulling up to a stoplight and you hear it—that high-pitched, piercing squeal that makes everyone on the sidewalk turn their heads. Or perhaps you have just spent an entire Saturday morning detailing your car, only to notice that after one short drive, your front wheels are already coated in a thick, dark, gritty soot. It is a frustrating experience that leads many DIY-minded vehicle owners to ask one specific question: How do I clean my car brake pads?
From a technician’s perspective, the squeak or the soot is often the brake system’s way of communicating with you. While a thorough cleaning can certainly help with minor noise issues and keep your wheels looking sharp, it is a process that requires a careful touch and an understanding of how your disc brakes actually function.
Should You Clean or Replace Your Brake Pads?
Before you reach for your jack, you need to determine if cleaning is actually the solution. If your brake system is performing well but you are dealing with excessive brake dust or a minor dust squeak, cleaning is a great preventative brake maintenance step. Brake dust is a natural byproduct of the friction material wearing down against the brake rotors. If this dust builds up in the crevices of the brake calipers, it can cause high-frequency vibrations that manifest as noise.
However, cleaning is not a cure for mechanical failure. If you feel a pulsation in the pedal, hear a metal-on-metal grinding sound, or if a brake inspection reveals that the friction material is thinner than three millimeters, cleaning will not help.

Important Note: Contaminated pads—those soaked in engine oil, grease, or leaking brake fluid—should never be cleaned and reused; they must be replaced. Similarly, if the pad material is cracked, glazed, or crumbling, a full brake pad replacement is your only safe option.
What You Will Need Before You Begin
Safety is the absolute priority when working on any part of the brake system. Ensure you have the following tools ready:
- Floor jack and jack stands (never work under a car supported only by a jack).
- Lug wrench.
- Specialized aerosol brake cleaner.
- Safety glasses or eye protection.
- Chemical-resistant gloves.
- Clean, lint-free shop rags or microfiber towels.
- A catch pan to collect runoff.
Safety Warning: Never use an air compressor to blow off brake components. Modern and older brake pads can contain hazardous fibers; blowing them into the air creates a fine particulate mist that is dangerous to breathe.
How to Safely Clean Brake Pads
- Preparation: Loosen the lug nuts while the car is still on the ground. Use your floor jack to lift the vehicle and secure it firmly on jack stands.
- Access the Assembly: Remove the wheel to reveal the brake calipers and rotors. For a basic cleaning, you can leave the pads inside the caliper, but removing them allows you to clean the contact points more effectively.
- The Cleaning Process: Place a catch pan under the brake assembly. Spray the aerosol brake cleaner generously over the brake calipers, the pads, and the brake rotors. The solvent is specifically formulated to dissolve grease and carry away dust without leaving a filmy residue.
- Wipe Down: Use a clean rag to wipe away dissolved grime from all accessible areas. If you have removed the pads, you can wipe the metal backing plates and the sides of the friction material.
- Reassemble: If you removed the pads, ensure they are seated correctly before putting the caliper back in place.

Common Mistakes to Avoid
The most frequent mistake DIYers make is trying to resurface the pads themselves. You might see pro-tips online suggesting you should use sandpaper to remove a glaze from the pads. Do not do this.
In modern automotive engineering, I do not recommend sanding brake pad friction material unless the specific manufacturer’s service procedures explicitly allow it. Modern pads are composed of complex chemical compounds that can be compromised by hand-sanding, potentially leading to uneven braking or premature failure.
Additionally, avoid using household soaps or oil-based cleaners. These can leave a residue on the disc brakes that significantly reduces friction, dangerously increasing your stopping distance.
When It Is Time to Replace the Pads
Cleaning is often a temporary fix for noise. If the squeaky brakes return immediately after a cleaning, it is a sign that the pads are either glazed beyond repair or the wear indicator—a small metal tab designed to screech when the pad is low—is making contact with the rotor. If your inspection reveals uneven wear, it could also point to a sticking caliper pin or a hydraulic issue, which requires professional service.

Frequently Asked Questions
Does cleaning brake pads stop all squeaking? Not always. Squeaking can be caused by glazed rotors, worn-out hardware, or even the specific chemical composition of high-performance metallic pads. Cleaning removes the dust that causes vibrations, but it cannot fix mechanical wear.
Can I use any solvent to clean my brakes? No. You should only use a dedicated brake cleaner. Other degreasers may contain oils or chemicals that damage the rubber seals in your brake system or contaminate the friction material.
Conclusion
Cleaning your brake pads is a productive way to maintain your vehicle and keep your wheels looking pristine. However, remember that your brakes are the most important safety feature on your vehicle. If your pads are thin, damaged, or contaminated, skip the cleaner and head straight for a replacement.
DISCLAIMER: Brake system designs vary significantly by vehicle make, model, and brake type. This guide is for informational purposes only. If you are unsure about any part of this procedure, or if your brakes continue to perform poorly after cleaning, consult a professional repair manual or a certified technician immediately. Safety should always come first.



No Comments Yet
Be the first to comment on this article.